Setup Guide
Complete installation and configuration guide for ElysAwareness.
Prerequisites
- Unreal Engine 5.8
- Windows 64-bit
- Enhanced Input (built into Unreal Engine and enabled automatically by Elys Awareness)
- Basic understanding of Unreal Engine components and actors
Elys Awareness does not require an external marketplace plugin, third-party library, account, or online service.
Installation
1. Install from FAB Marketplace
Download ElysAwareness from the FAB Marketplace and install it into your project.
2. Enable the Plugin
- Open your project in Unreal Editor
- Go to Edit -> Plugins
- Search for "Elys Awareness"
- Check the box to enable it
- Restart the editor when prompted
3. Verify Installation
In the Content Browser, enable "Show Plugin Content" and verify the ElysAwareness folder appears.
Before running the demo in a blank or legacy project, open Project Settings → Engine → Input → Default Classes and select:
- Default Player Input Class:
EnhancedPlayerInput - Default Input Component Class:
EnhancedInputComponent
Many Unreal templates already configure these. Keep your own subclasses if they derive from these Enhanced Input classes. Enabling the engine plugin alone does not replace a project's legacy input classes. Restart the editor after changing them.
The equivalent project configuration in Config/DefaultInput.ini is:
[/Script/Engine.InputSettings]
DefaultPlayerInputClass=/Script/EnhancedInput.EnhancedPlayerInput
DefaultInputComponentClass=/Script/EnhancedInput.EnhancedInputComponent
4. Run the bundled sample
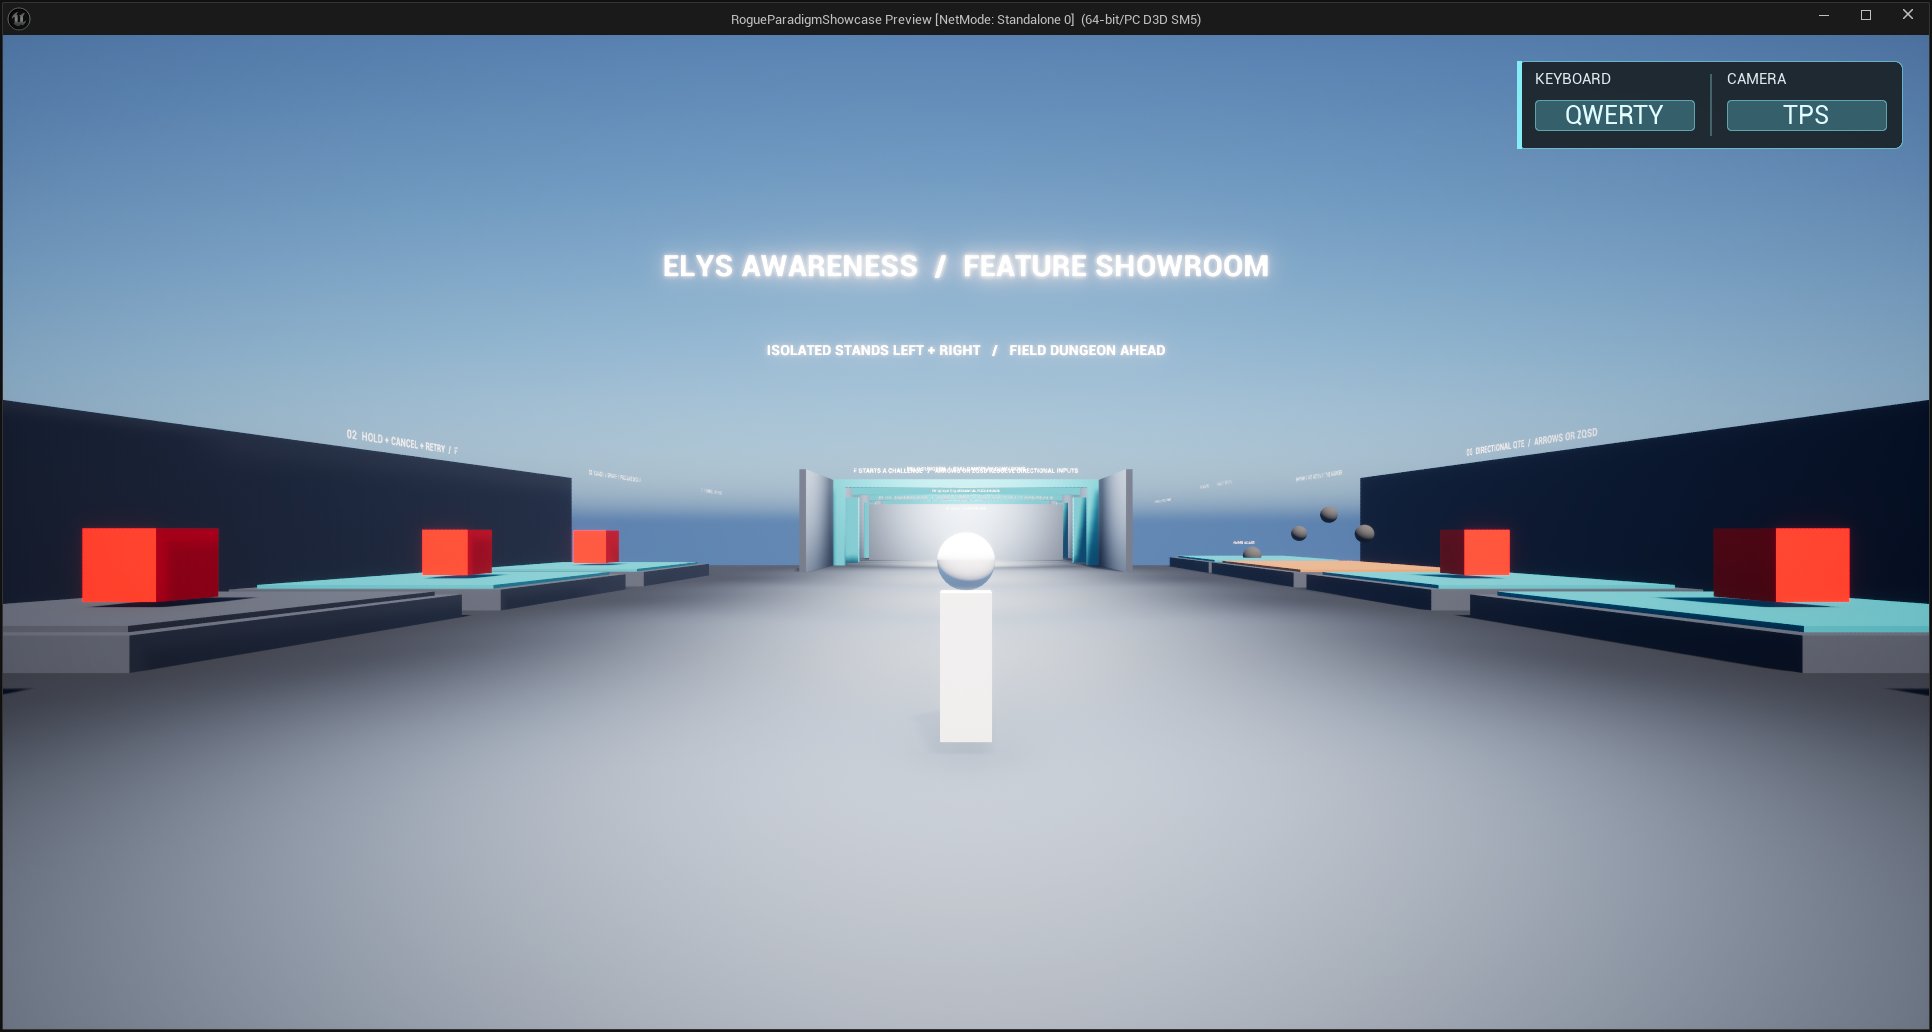
Open ElysAwareness Content/Demo/Demo_ERP_Awareness_Showcase and start Play In Editor. This is the plugin's only sample map. It includes isolated feature stands, a compact field dungeon, targeting drones, configured interaction challenges, and optional reference widgets.
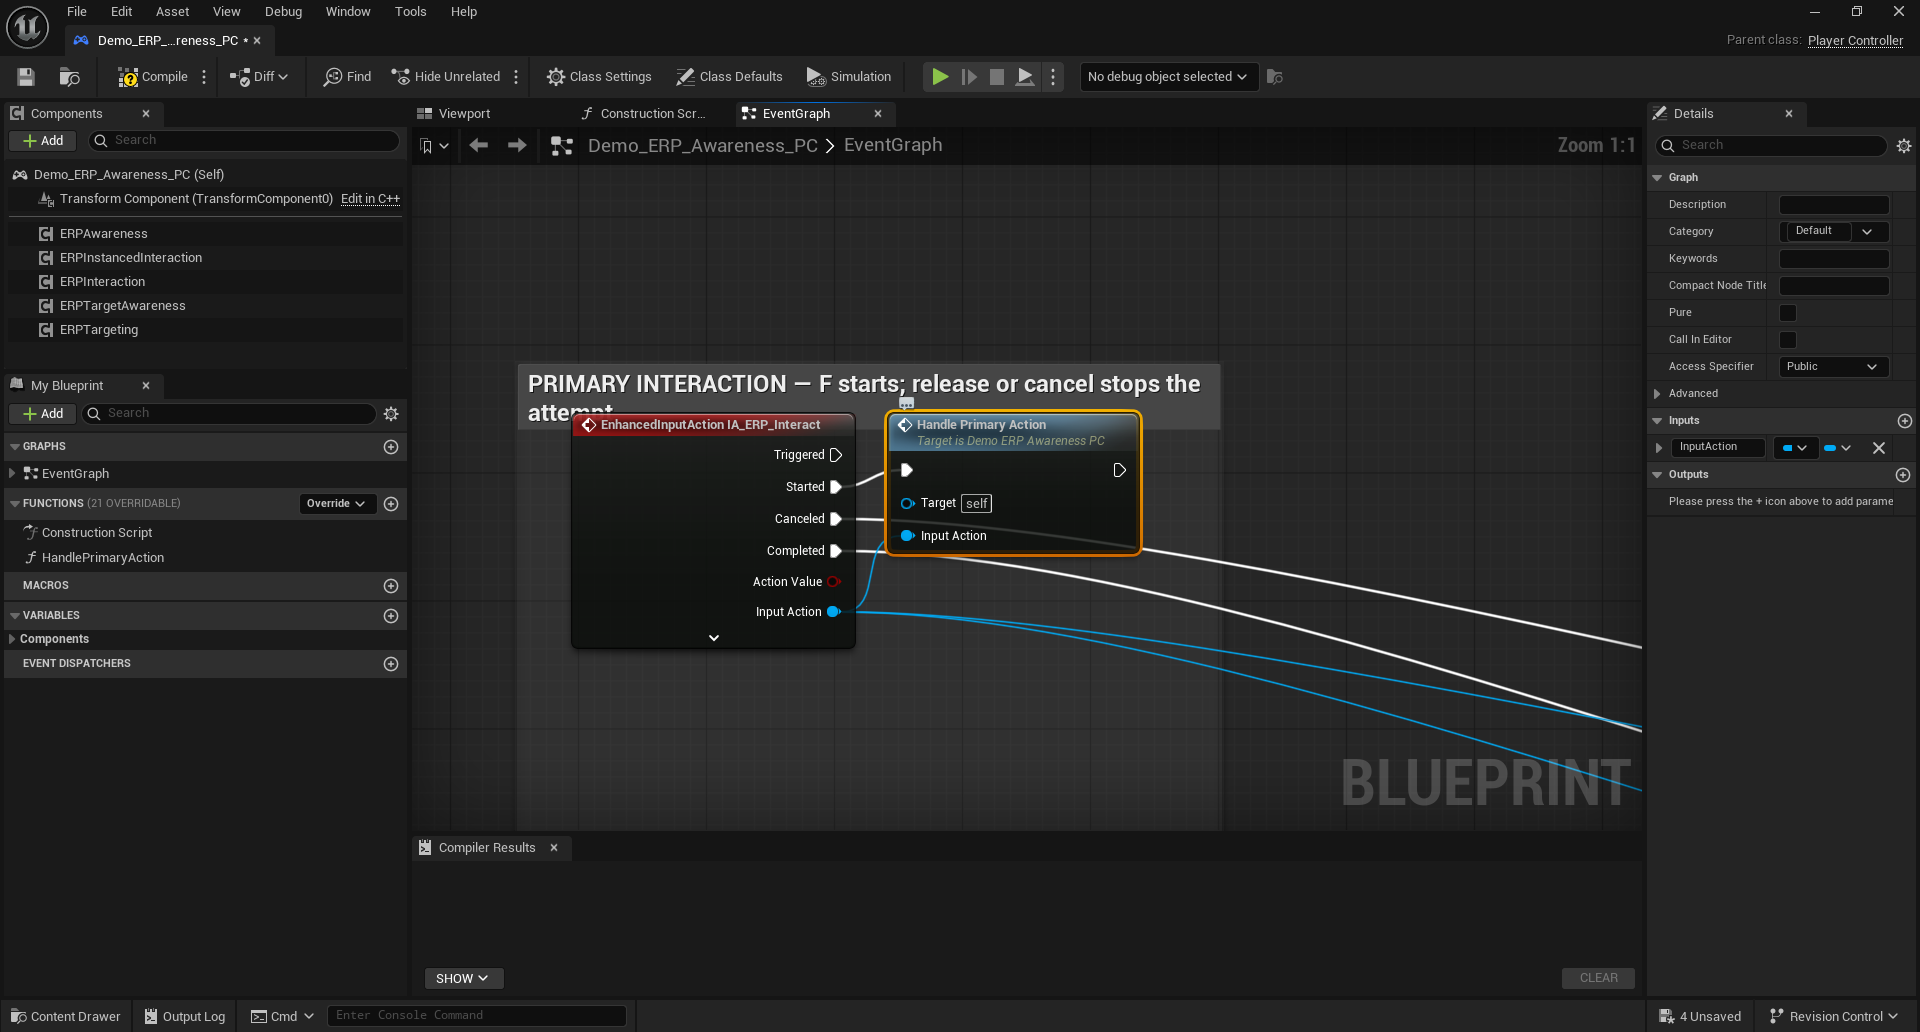
The demo installs its own Enhanced Input mapping context, IMC_ERP_Awareness_Demo, from Demo_ERP_Awareness_PC::BeginPlay, guarded by IsLocalPlayerController. The same local controller creates and owns the demo HUD. This initializes input on standalone players, listen-server hosts and network clients without creating UI for remote pawns or dedicated servers. OnPossess runs on the server and must not be the only place that installs a client's input mappings. In a real project, add the equivalent mappings to your own input context.
5. Update Build Configuration (C++ Projects)
Add the module to your .Build.cs file:
PublicDependencyModuleNames.AddRange(new string[] {
    "Core",
    "CoreUObject",
    "Engine",
    "ElysAwareness"
});
Quick Start
Blueprint Setup
1. Add Perception Component
Select your PlayerController or Pawn and add ERPAwarenessComponent.
2. Configure Target Pipeline
In component details, expand Perception | Pipelines and add a channel pipeline:
Basic Settings:
- Channel Id:
Target - Default Sampling Range: 2000.0
Pipeline Stages:
-
Sampler (click + to add):
- Type:
ERPSphereOverlapSampler - Object Channel: WorldDynamic (or the collision object type used by your candidates)
- Ignore Context Actor: check
- Type:
-
Filters:
- Type:
ERPTargetableFilter - Type:
ERPLineOfSightFilter(Visibility) when targets must not be selected through walls
- Type:
-
Scorers (each entry has Scorer + Weight):
- Scorer:
ERPDistanceScorer(Normalize By Range: check) - Weight: 1.0
- Scorer:
-
Resolver Policy:
LowestScore(default — lowest score wins) -
Sticky Bias:
0.1(default — prevents flickering between similar candidates)
Note: Aggregation is always weighted average (built-in). Resolution uses the ResolverPolicy enum and StickyBias float directly on the pipeline struct — no separate classes needed.
3. Add Targeting Domain Component
On your PlayerController or Pawn:
- Add Component ->
ERPTargetingComponent - Set Channel Id to
Target - It will auto-find the PerceptionComponent on the same actor
4. Make Actors Targetable
On target actors (enemies, NPCs):
- Class Settings -> Interfaces -> Add
ERPTargetable - In Event Graph, implement
Can Be Targeted By - Return
true(or add custom logic)
5. Bind Events
On your targeting component:
Event BeginPlay
  -> Get Component (ERPTargetingComponent)
  -> Bind Event to OnDomainCandidateChanged
    -> Print String: "Target Changed: {NewCandidate}"
Or use UERPChannelListenerComponent for lightweight event-only listening:
1. Add Component -> ERPChannelListenerComponent
2. Set Channel Id to "Target"
3. Bind to OnCandidateAcquired / OnCandidateLost
Blueprint Example
Complete Target System
Variables:
CurrentTarget(Actor reference)
Event Graph:
// Using TargetingComponent events
Event: OnDomainCandidateChanged (Previous, New, ChannelId)
  -> Set CurrentTarget = New
  -> Branch: IsValid(New)
    True: -> Print "Target Acquired"
    False: -> Print "Target Lost"

// Get current target on demand
Event Input: AttackButton
  -> TargetingComp -> GetCurrentCandidate
  -> IsValid?
    True: -> Execute attack on target
    False: -> Print: "No target available"
C++ Setup
1. Create Component
YourPlayerController.h:
#pragma once

#include "CoreMinimal.h"
#include "GameFramework/PlayerController.h"
#include "Core/ERPAwarenessComponent.h"
#include "Domains/Targeting/ERPTargetingComponent.h"
#include "YourPlayerController.generated.h"

UCLASS()
class YOURPROJECT_API AYourPlayerController : public APlayerController
{
    GENERATED_BODY()

public:
    AYourPlayerController();

protected:
    virtual void BeginPlay() override;

    UPROPERTY(VisibleAnywhere, BlueprintReadOnly, Category = "Perception")
    UERPAwarenessComponent* PerceptionComponent;

    UPROPERTY(VisibleAnywhere, BlueprintReadOnly, Category = "Perception")
    UERPTargetingComponent* TargetingComponent;

private:
    UFUNCTION()
    void OnTargetChanged(AActor* Previous, AActor* New, FName ChannelId);
};
YourPlayerController.cpp:
#include "YourPlayerController.h"

AYourPlayerController::AYourPlayerController()
{
    PerceptionComponent = CreateDefaultSubobject<UERPAwarenessComponent>(TEXT("PerceptionComponent"));

    TargetingComponent = CreateDefaultSubobject<UERPTargetingComponent>(TEXT("TargetingComponent"));
    TargetingComponent->ChannelId = FName("Target");
}

void AYourPlayerController::BeginPlay()
{
    Super::BeginPlay();

    // TargetingComponent auto-binds to PerceptionComponent at BeginPlay
    TargetingComponent->OnDomainCandidateChanged.AddDynamic(this, &AYourPlayerController::OnTargetChanged);
}

void AYourPlayerController::OnTargetChanged(AActor* Previous, AActor* New, FName ChannelId)
{
    if (New)
    {
        // Replace LogMyGame with your project's log category
        UE_LOG(LogMyGame, Log, TEXT("Target acquired: %s"), *New->GetName());
    }
    else
    {
        // Replace LogMyGame with your project's log category
        UE_LOG(LogMyGame, Log, TEXT("Target lost"));
    }
}
2. Implement Targetable Interface
YourEnemy.h:
#pragma once

#include "CoreMinimal.h"
#include "GameFramework/Character.h"
#include "Domains/Targeting/ERPTargetable.h"
#include "YourEnemy.generated.h"

UCLASS()
class YOURPROJECT_API AYourEnemy : public ACharacter, public IERPTargetable
{
    GENERATED_BODY()

public:
    virtual bool CanBeTargetedBy_Implementation(AActor* TargetingActor) const override;

protected:
    UPROPERTY(EditAnywhere, BlueprintReadWrite, Category = "Combat")
    bool bIsAlive = true;
};
YourEnemy.cpp:
#include "YourEnemy.h"

bool AYourEnemy::CanBeTargetedBy_Implementation(AActor* TargetingActor) const
{
    return bIsAlive;
}
Testing
Verification Checklist
- Perception component added to PlayerController/Pawn
- Pipeline configured with required stages (Sampler minimum, plus filters/scorers as needed)
- Default sampling range set (e.g., 2000)
- Domain component added (TargetingComponent or InteractionComponent)
- Channel Id matches between pipeline and domain component
- Target actors implement appropriate interface (IERPTargetable or IERPInteractable)
- Interface methods return expected values
- Events bound and firing
Debug Visualization
Enable bDebugPerception on ERPAwarenessComponent to see candidate logging.
Console commands:
stat GAME // Show component tick times
Performance Tuning
- PerceptionTickInterval: Set on ERPAwarenessComponent to reduce evaluation frequency (e.g., 0.1 = 10 Hz)
- DefaultSamplingRange: Keep as low as practical
- Scorer Weights: Use to balance multiple scoring factors
Troubleshooting
Target Not Detected
Check Interface: Verify target implements IERPTargetable and CanBeTargetedBy returns true.
Check Range: Increase DefaultSamplingRange or verify actors are within range.
Check Collision: Verify TraceChannel in Sampler matches actor collision settings.
Events Not Firing
Bind Timing: Bind in BeginPlay, not constructor. Use AddDynamic for delegates.
Check Channel Id: Verify ChannelId matches between pipeline configuration and domain component.
Performance Issues
Reduce Range: Lower DefaultSamplingRange to minimum needed.
Adjust Tick Rate: Set PerceptionTickInterval on the perception component (e.g., 0.1 for 10 Hz).
Optimize Sampler: Use tighter Actor Class filter.
Next Steps
Read Pipeline System to understand how detection works.
Explore Interaction Guide for proximity-based interactions.
Read Challenge System before adding mash, alternating, QTE, timing, or rhythm interactions.
Use Playable Showcase as a stand-by-stand verification guide.
Explore Targeting Guide for combat targeting.
Check API Reference for detailed class documentation.